Adding photos is easier than you think.
STEP 1
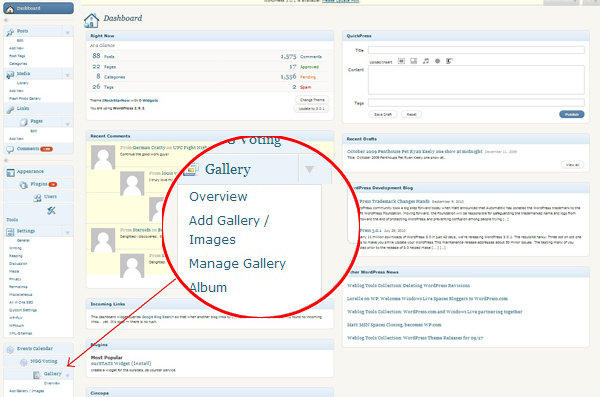
At the bottom left of your WordPress website administration page, you’ll find “Gallery”. The two options you’ll be using are “Add Gallery/Images” to create and add photos and “Manage Gallery” to delete photos. To begin, click “Add Gallery/Images”
STEP 2
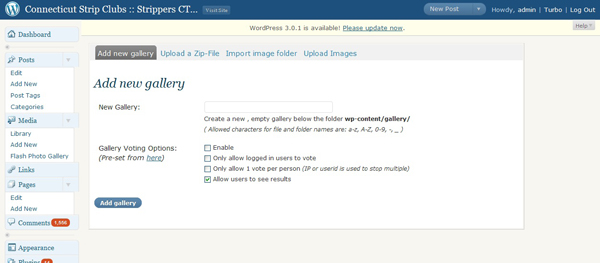
Name your gallery and click “Add Gallery”
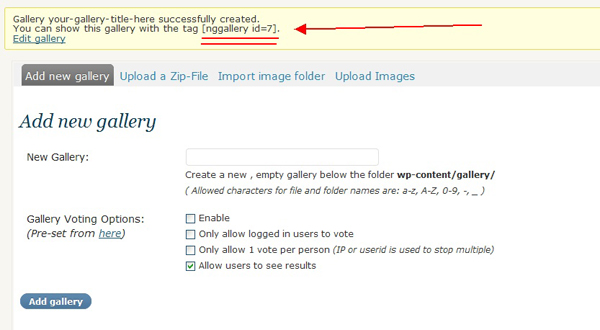
After adding the gallery, you’ll get the confirmation that your gallery has been created by information in a yellow box with the message: “Your Gallery Title Here-gallery successfully created.”
You can show this gallery with the tag assigned (see double underlined tag on image below).
STEP 3
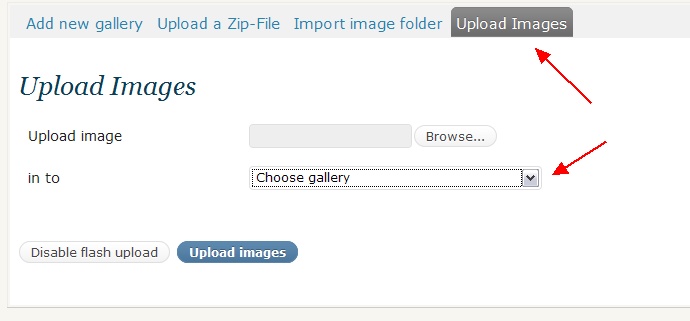
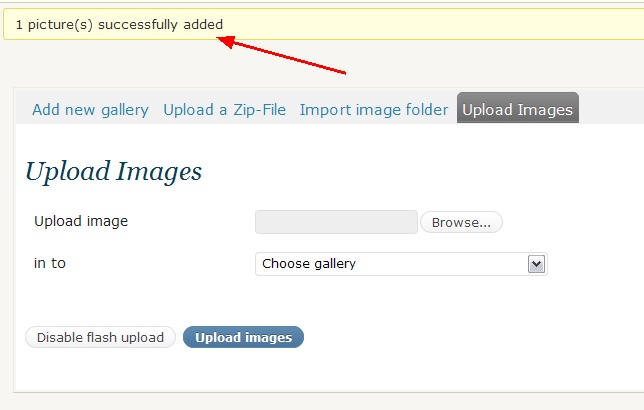
Choose Upload Images from the options above the white box. From this window you’ll be able to browse your computer to upload individual images. Browse for your image. Use the drop-down menu to choose the gallery.
STEP 4
Upload images. You’ll get a confirmation like the one below.
STEP 5
When you have uploaded the images you want, click “Manage Gallery” from the menu items at the bottom left of the admin page.

STEP 6
Choose your gallery. A window like the one below will open up, showing thumbnails and options for your images. From here, you can edit your photographs. As you hover your mouse over the image title, you have the following options: View, Meta, Edit Thumb, Rotate or Delete.
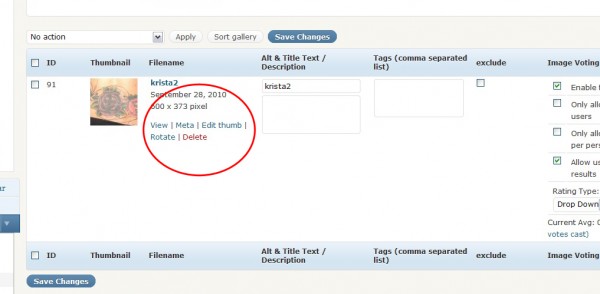
Save your changes! Congratulations, you have successfully created a gallery, now to add your gallery to the Photos page:
STEP 7
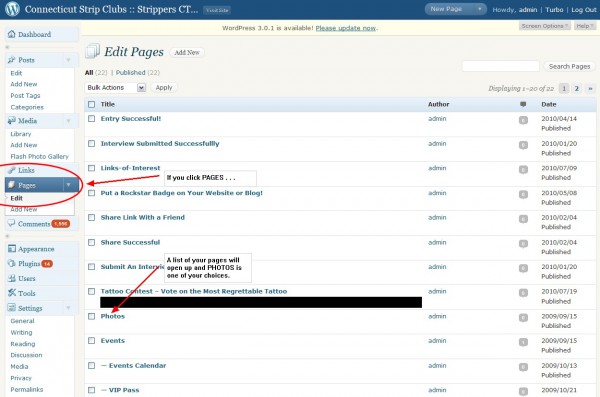
Open your page by choosing “Pages” in the left hand column of your WordPress website administration area. A list of your pages appears. “Photos” is one of them. As your mouse passes over the post title, options will appear. Choose “Edit”
STEP 8
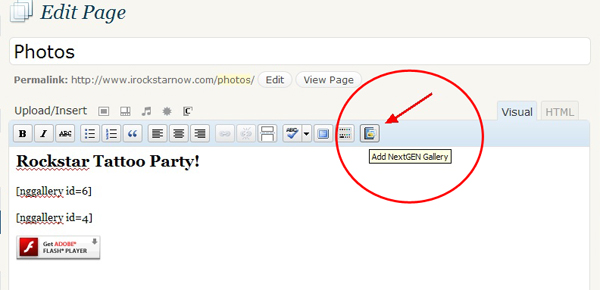
An edit window will appear. Make sure you are in Visual mode.

The far right hand icon in the edit window is “Add NextGen Gallery”.
STEP 9
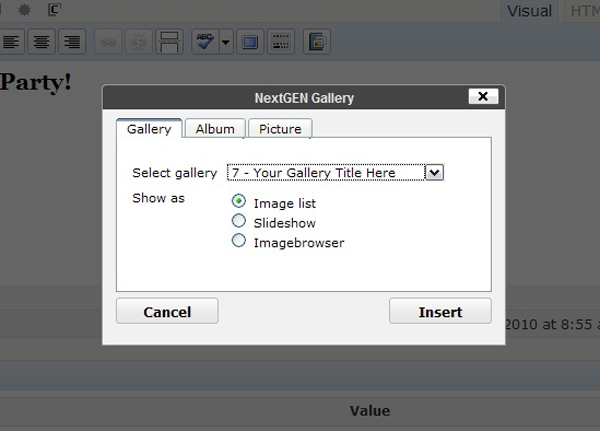
Choose the gallery you want to insert and click “Image List”.
STEP 10
Preview your page. If you like what you see, go back to your WordPress editor tab and publish, update or save draft.
